
Am I the only one who uses baking as a form of therapy? I have been wanting to try a chocolate cake for the longest time, since it’s my favourite dessert, but I was a little intimidated. If you know me, you know my love for baking and experimenting with recipes. I have baked a cake once in my life, I think it was about 5 years ago, I tried a red velvet cake (which was my favourite at the time), and it turned out good, but the frosting was a little too runny, but hey, I took that as a win for my first try. 😂
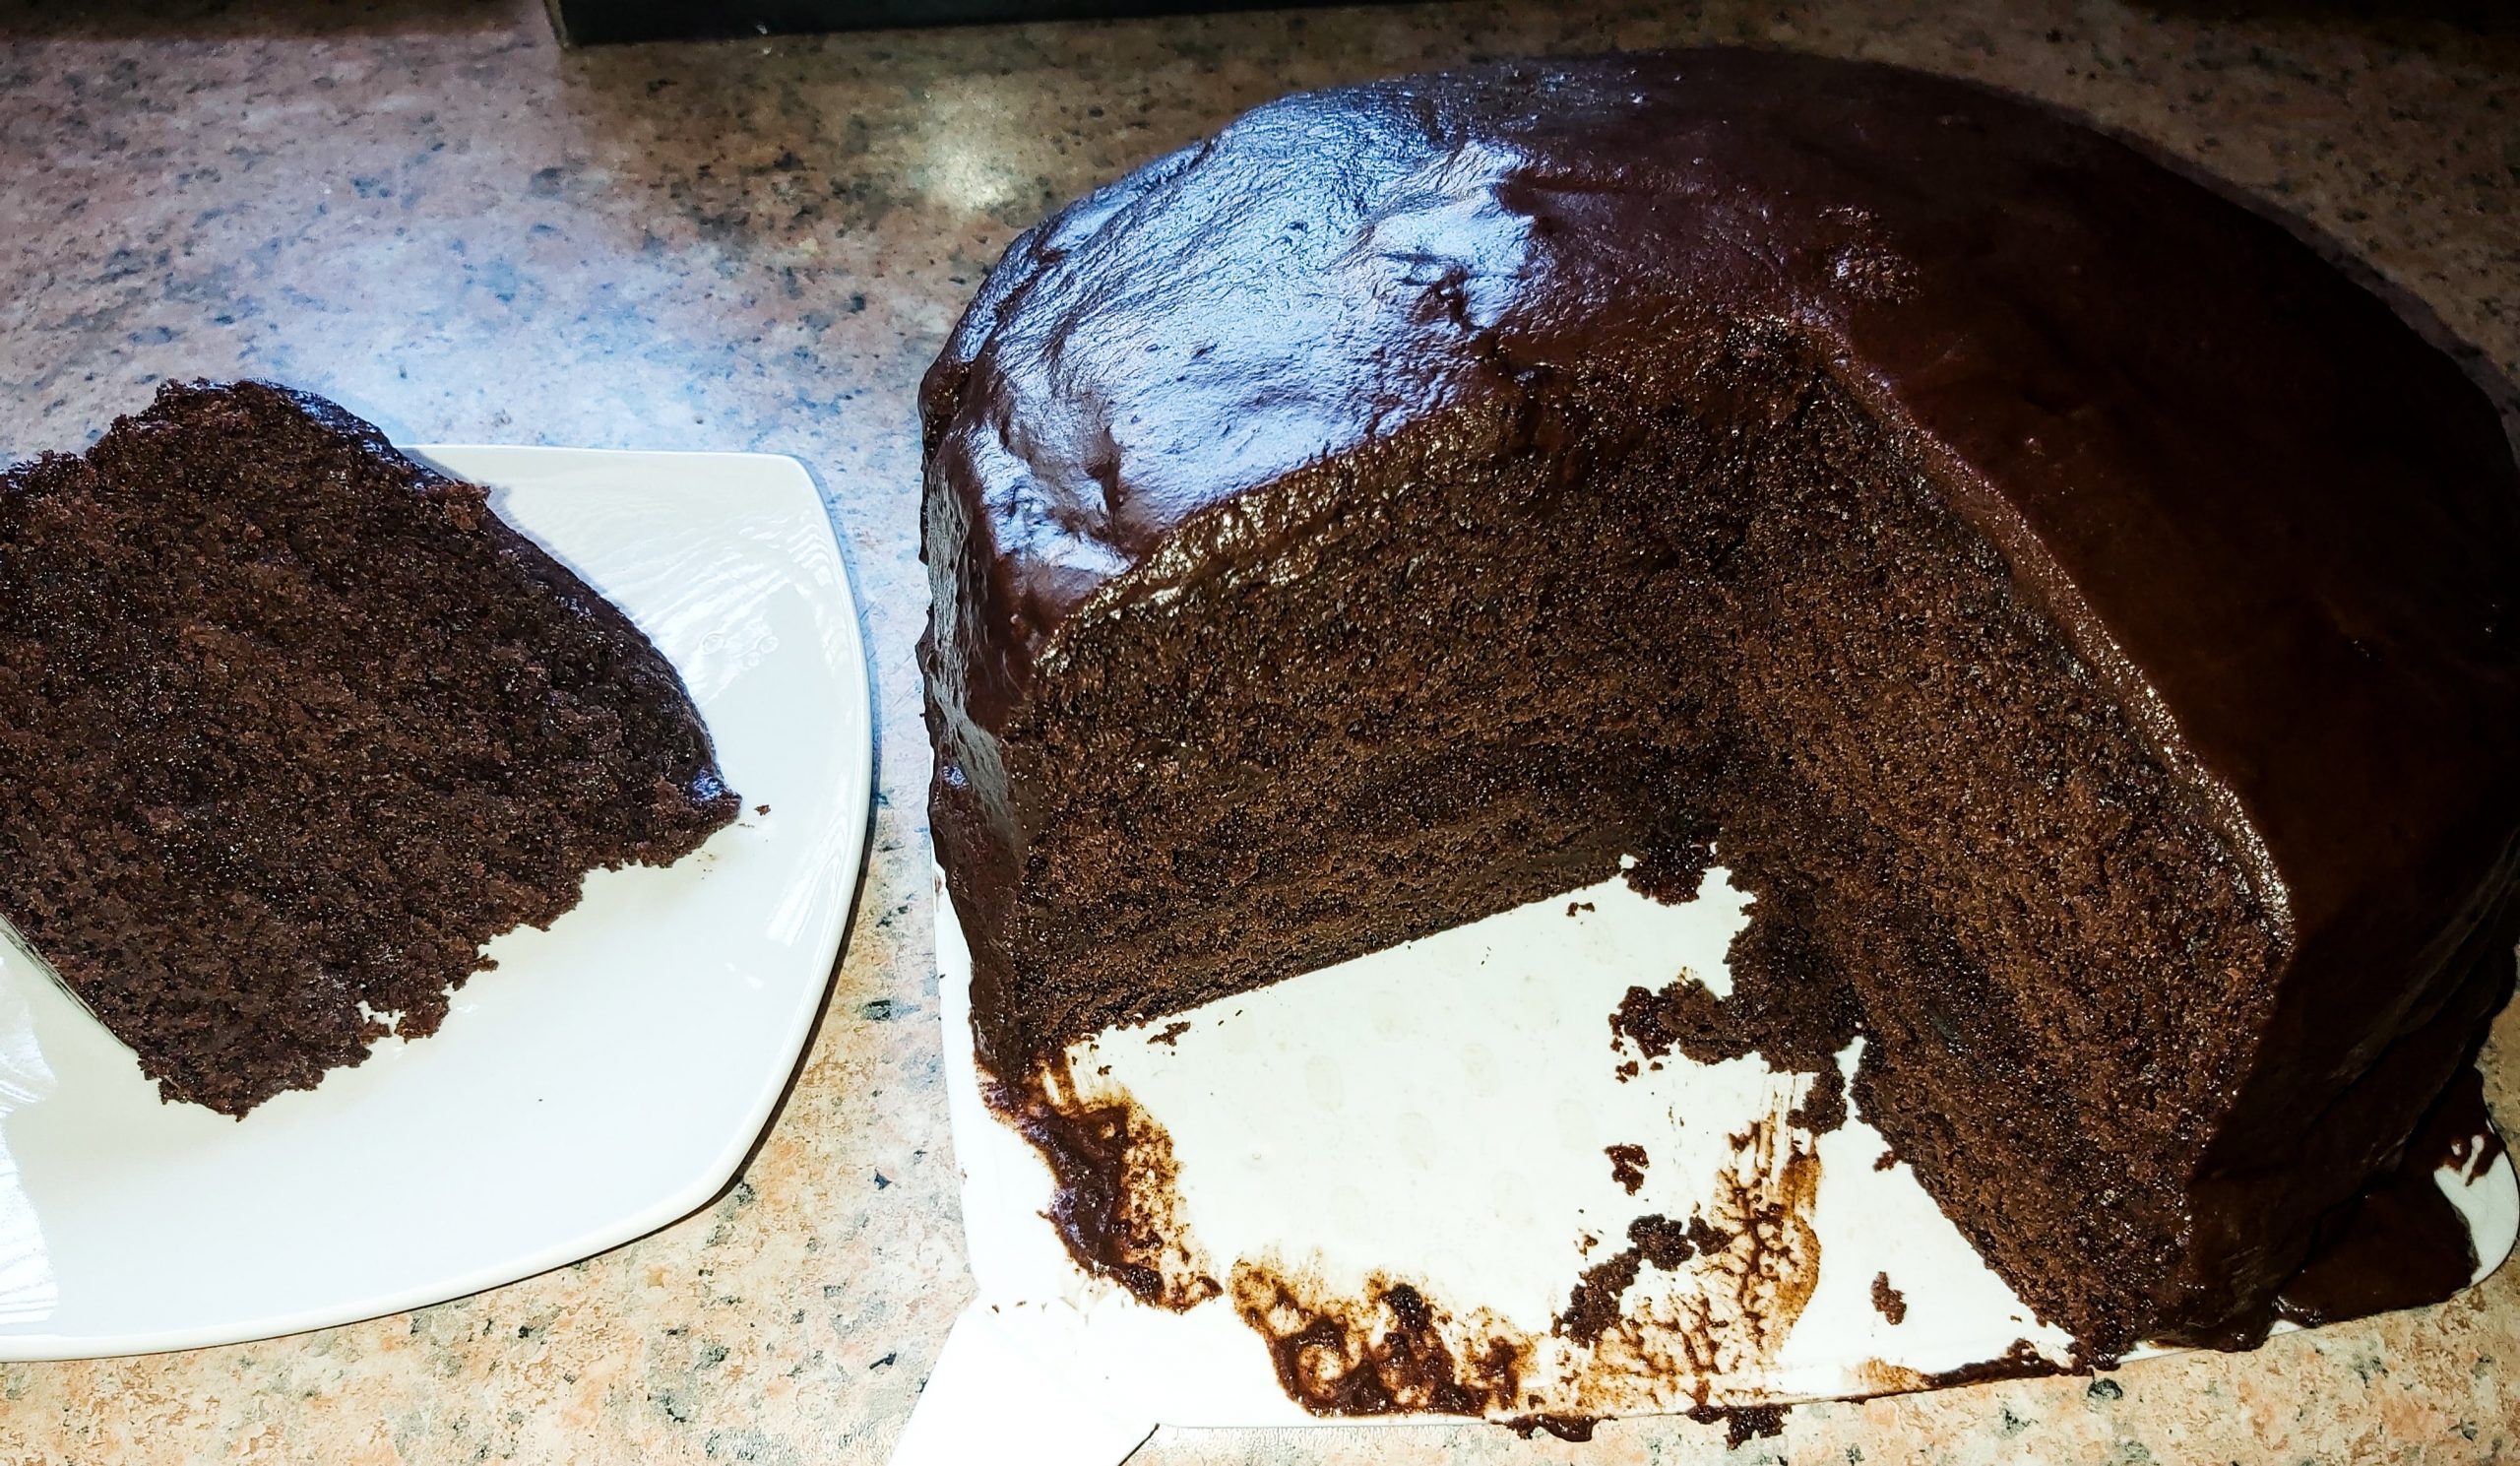
I personally don’t have a sweet tooth, so baking something as big as a cake seemed like a waste since I know I will probably have 1 slice every 5 days, and obviously the cake wouldn’t last that long, so I shied away from it until now, with my boyfriend and his massive love for all things sweet, I knew he would appreciate it more than I would. This cake is so moist (I hate this word, but there’s really no other word to describe it), chocolaty & decadent, and will keep well for 4–5 days, and the best part? Totally idiot-proof 😂, I kid, but it really is beginner friendly.
Ingredients
• Butter and flour for coating and dusting the cake pans
• 3 cups all-purpose flour
• 3 cups sugar (normal granulated sugar is the best for this recipe)
• 1½ cups cocoa powder (I prefer unsweetened, you don’t want your cake to be unbearably sweet – sometimes the packaging won’t say “unsweetened”, just check the ingredients, if sugar isn’t on the list, then you are good to go)
• 1 tablespoon bicarbonate of soda
• 1½ teaspoons baking powder
• 1 teaspoon salt
• 4 large eggs
• 1½ cups amasi (or buttermilk, if you are fancy)
• 1½ cups warm water
• ½ cup vegetable oil (I used olive oil, but you can use normal sunflower oil)
• 2 teaspoons vanilla extract
Instructions
Preheat your oven to 180 degrees Celsius. Butter two 23cm or 9-inch cake rounds. Dust with flour and discard the excess.
Sift together the flour, sugar, cocoa powder, bicarbonate of soda, baking powder, and salt in a big bowl and mix until combined.
Add eggs, amasi/buttermilk, warm water, vegetable oil, and vanilla extract. Mix until smooth.
Divide the batter among the 2 pans evenly.
Bake for 30-35 minutes until the cakes pass the toothpick test (stick a toothpick in and if it comes out clean, your cakes are ready, remember to keep checking your cakes, it could take longer or shorter, depending on your oven).
Cool for 15 minutes and then take out the cakes out of the cake pans onto wire racks and allow to cool completely.
Once your cake has cooled completely, you can use your favourite frosting and enjoy! Below is the recipe to my favourite frosting.
Dark Chocolate Cream Cheese Buttercream Frosting
Ingredients
• 1 cup unsalted butter (This is +/- 250g)
• 50g of at least 80% cocoa dark chocolate ( I used the 90% cocoa dark chocolate from Lindt)
• 230g plain cream cheese
• 1½ cups unsweetened cocoa powder (you really wanna use unsweetened because this frosting has a lot of sugar)
• 3 teaspoons vanilla extract
• 4-5 cups icing sugar
• about ¼ cup milk (as needed)
Instructions
In a microwave oven safe bowl, melt your butter and dark chocolate together in the microwave oven. Do it in 15 seconds intervals and keep checking. The butter will melt faster than the chocolate, this is fine, once the butter has slightly melted, combine the mixture, and the heat from the butter will continue to melt your chocolate even more as you stir. Mix until well combined, it should NOT be runny, the consistency should still be thick.
P.S. DO NOT OVERHEAT YOUR BUTTER, the purpose of this is to soften it and slightly melt the chocolate, so small time intervals in the microwave oven are very key.
In a large bowl, mix together the butter chocolate mixture and the cream cheese until fluffy. Use a hand mixer or stand mixer for best results. An eggbeater will work as well, you just have to beat it longer (Think of it as an arm exercise).
Add in your sifted cocoa powder, then add your vanilla extract. Mix until combined.
Add in sifted icing sugar, 1 cup at a time, and keep mixing after each cup.
Add milk in small quantities to make a spreadable consistency – DO NOT ADD TOO MUCH MILK AT ONCE. The frosting should be very thick and not runny. Runny frosting is really hard to work with and doesn’t produce the best looking cake, trust me on this.
Notes
- You really do not need to buy buttermilk, it’s expensive. Use amasi and save some coin, it works just as well, that’s what I used.
- If you do not have icing sugar, you can make your own from regular granulated sugar, you just need a high-powered blender. Just add the sugar in the blender and blend it for about a minute or so, till it becomes powder. The quality of your blender is really important here, so if you don’t trust your blender, then opt for buying the icing sugar.
- If your frosting is a little runny, you can add more icing sugar to thicken it, add it in small quantities until you reach the thick, spreadable consistency.
- If you want to thicken your frosting without adding more icing sugar, then you may want to refrigerate it for an hour or 2, this will thicken it. You can also use a little flour as a thickener, however, do not use a lot, you don’t want the flour to change the flavour of your frosting.
Now for the fun part, assemble your cake and get frosting!

I hope you enjoy this cake recipe, and let me know how it turned out!
xoxo, Refiloe 💕


Can’t get enough of it! 🤤🤤🤤🤤🤤
Am definitely trying this one out, today…
Yaaay! Let me know how it turns out. 💃🏾